This article appeared in the Peterson’s Magazine in 1860. I thought it could be useful to those looking to size these patterns into dolls clothes or costumes. Or it could just be interesting to know how the ladies did that back in those days.
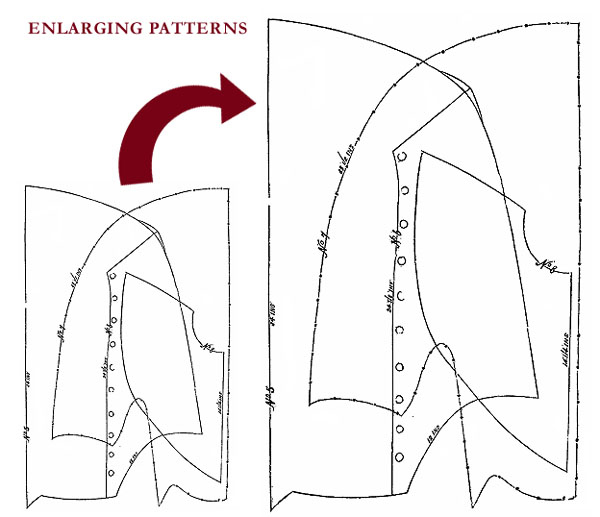
How to enlarge a diagram – A new subscriber asks us how to enlarge the patterns in out diagrams. The process is quite simple. Suppose No. II, in the first of the two diagrams, in this number, (for the Louis the Fourteenth cloak) is to be enlarged. First take a piece of newspaper, or other paper, as large as you think will be required; lay it flat on a large table; and then marl off the bottom line, making it 21 3/4 inches long, which is what the pattern should be when enlarged. Having done this, draw the right hand angle, which may be done by transferring the andle, with a piece of transfer paper, or by cutting a piece of ordinary paper to fit into it. Then make the line, up the right hand side, 21 5/8 inches long; or eight inches longer (as stated before) than the pattern is marked. Proceed in this way all round the pattern. Where the lines are curved instead of straight, the eye must be the guide. If a sleeve-hole is to be cut out, it is best to fit the paper pattern to the person who is to wear the article you are making, and round it out accordingly. A little practice will make you perfect. We know many ladies, both in Philadelphia and elsewhere, who dress thier children, and cut out most of thier own cloaks, &c, from diagrams in this Magazine. Generally we mark on one side of a pattern with the length, for it is easy to determine the length of the others, by marking them, in the large pattern, proportioned to the length of the side that is given.
2010-05-26